Importing
● REQUEST: Request ID
● DATAPAKID: Number of current data package
Exporting
● MONITOR: Table for user-defined monitoring. This table is filled by means of row structure MONITOR_REC (the record number of the processed record is inserted automatically from the framework).
Changing
● SOURCE_PACKAGE: Structure that contains the inbound fields of the routine.
Raising
● CX_RSROUT_ABORT: If a raise exception type cx rsrout_abort is triggered in the routine, the system terminates the entire load process. The request is highlighted in the extraction monitor as having been terminated. The system stops processing the current data package. This can be useful with serious errors.
Monday, November 9, 2009

Start Routine
Example: Start Routine
In the SAP ERP system, you are loading data using the General Ledger: Transaction Figures DataSource (FI_GL_1) into the DataStore object FIGL: Transaction Figures (0FIGL_O06).
You want to create a start routine that deletes all the records from a data package that have debit and credit postings that are equal to zero.
...
1. Create a transformation. The source of the transformation has the Total Debit Postings (UMSOL) and Total Credit Postings (UMHAB) fields. They are assigned to the InfoObjects Total Debit Postings (0DEBIT) and Total Credit Postings (0CREDIT).
2. Choose Create Start Routine. The routine editor opens.
3. You go to the local part of the routine. You enter the following lines of code:
*----------------------------------------------------------------------*
METHOD start_routine.
*=== Segments ===
FIELD-SYMBOLS:
TYPE _ty_s_SC_1.
*$*$ begin of routine - insert your code only below this line *-*
DELETE SOURCE_PACKAGE where UMHAB = 0 and UMSOL = 0
*$*$ end of routine - insert your code only before this line *-*
ENDMETHOD. "start_routine
*----------------------------------------------------------------------*
The delete statement is the only line you require in order to filter debit and credit postings without values out of the data package.
4. You exit the routine editor.
5. You save the transformation. An edit icon next to the Start Routine indicates that a start routine is available.
http://help.sap.com/saphelp_nw2004s/helpdata/en/43/c3963dfbde4dede10000000a422035/frameset.htm
In the SAP ERP system, you are loading data using the General Ledger: Transaction Figures DataSource (FI_GL_1) into the DataStore object FIGL: Transaction Figures (0FIGL_O06).
You want to create a start routine that deletes all the records from a data package that have debit and credit postings that are equal to zero.
...
1. Create a transformation. The source of the transformation has the Total Debit Postings (UMSOL) and Total Credit Postings (UMHAB) fields. They are assigned to the InfoObjects Total Debit Postings (0DEBIT) and Total Credit Postings (0CREDIT).
2. Choose Create Start Routine. The routine editor opens.
3. You go to the local part of the routine. You enter the following lines of code:
*----------------------------------------------------------------------*
METHOD start_routine.
*=== Segments ===
FIELD-SYMBOLS:
*$*$ begin of routine - insert your code only below this line *-*
DELETE SOURCE_PACKAGE where UMHAB = 0 and UMSOL = 0
*$*$ end of routine - insert your code only before this line *-*
ENDMETHOD. "start_routine
*----------------------------------------------------------------------*
The delete statement is the only line you require in order to filter debit and credit postings without values out of the data package.
4. You exit the routine editor.
5. You save the transformation. An edit icon next to the Start Routine indicates that a start routine is available.
http://help.sap.com/saphelp_nw2004s/helpdata/en/43/c3963dfbde4dede10000000a422035/frameset.htm
Routines in Transformations
You can use routines to define complex transformation rules.
Routines are local ABAP classes that consist of a predefined definition area and an implementation area. The TYPES for the inbound and outbound parameters and the signature of the routine (ABAP method) are stored in the definition area. The actual routine is created in the implementation area. ABAP object statements are available in the coding of the routine. Upon generation, the coding is embedded in the local class of the transformation program as the method.
The routine has a global part and a local part. In the global part you define global data declarations 'CLASS DATA'. These are available in all routines.
You can create function modules, methods or external subprograms in the ABAP Workbench if you want to reuse source code in routines. You can call these in the local part of the routine. If you want to transport a routine that includes calls of this type, the routine and the object called should be included in the same transport request.
Transformations include different types of routine:
Start routines
Routines for Key Figures or Characteristics
End routines and
Expert routine.
Routines are local ABAP classes that consist of a predefined definition area and an implementation area. The TYPES for the inbound and outbound parameters and the signature of the routine (ABAP method) are stored in the definition area. The actual routine is created in the implementation area. ABAP object statements are available in the coding of the routine. Upon generation, the coding is embedded in the local class of the transformation program as the method.
The routine has a global part and a local part. In the global part you define global data declarations 'CLASS DATA'. These are available in all routines.
You can create function modules, methods or external subprograms in the ABAP Workbench if you want to reuse source code in routines. You can call these in the local part of the routine. If you want to transport a routine that includes calls of this type, the routine and the object called should be included in the same transport request.
Transformations include different types of routine:
Start routines
Routines for Key Figures or Characteristics
End routines and
Expert routine.
Wednesday, September 30, 2009
Business Content Installation's
TC - RSORBCT
or
RSA1 --> BI Content.


If you want to install a Infocube select Infocube in second frame.
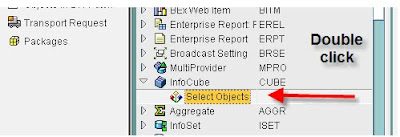

It ask for source system , select that

It starts collecting and you can see


After Installing

or
RSA1 --> BI Content.


If you want to install a Infocube select Infocube in second frame.


It ask for source system , select that

It starts collecting and you can see


After Installing

Wednesday, September 16, 2009
Process Chains
Process Chains
Dear All,
Here with, i am providing you some best links for process chains, Which explains clearly how to create process chain step by step ?
Step by step procedure to create process chain by Jeurgen
https://www.sdn.sap.com/irj/sdn/weblogs?blog=/pub/wlg/8280
For Creating Process chain Step by step:
http://help.sap.com/saphelp_nw70/helpdata/en/67/13843b74f7be0fe10000000a114084/content.htm
For maintianing Pc:
http://help.sap.com/saphelp_nw70/helpdata/en/d3/53e03b8235953ee10000000a114084/content.htm
For all other info abt PC:
http://help.sap.com/saphelp_nw70/helpdata/en/8f/c08b3baaa59649e10000000a11402f/content.htm
Best Regards, Kali
Dear All,
Here with, i am providing you some best links for process chains, Which explains clearly how to create process chain step by step ?
Step by step procedure to create process chain by Jeurgen
https://www.sdn.sap.com/irj/sdn/weblogs?blog=/pub/wlg/8280
For Creating Process chain Step by step:
http://help.sap.com/saphelp_nw70/helpdata/en/67/13843b74f7be0fe10000000a114084/content.htm
For maintianing Pc:
http://help.sap.com/saphelp_nw70/helpdata/en/d3/53e03b8235953ee10000000a114084/content.htm
For all other info abt PC:
http://help.sap.com/saphelp_nw70/helpdata/en/8f/c08b3baaa59649e10000000a11402f/content.htm
Best Regards, Kali
Friday, August 7, 2009
Inventory Marker Updates
Inventory Marker Updates
Initialization INFOCUBE LEVEL and DATASOURCE LEVEL 7.0
IF 3.0 FLOW TRANSFERLEVEL SELECT OPENING BALANCE
SELECT OPENING BALANCE IN GENERAL TAB (BX ONLY)
IPACK LEVEL SELECT GENERATE INTI(BX)
IPACK LEVEL INITDELTA(BF,UM)
BX WITH MARKER
BF WITHOUT MARKER
UM WITHOUT MARKER
DELTALOAD
BX Wont Support Delta.
BF WITH MARKER
UM WITH MARKER
Initialization INFOCUBE LEVEL and DATASOURCE LEVEL 7.0
IF 3.0 FLOW TRANSFERLEVEL SELECT OPENING BALANCE
SELECT OPENING BALANCE IN GENERAL TAB (BX ONLY)
IPACK LEVEL SELECT GENERATE INTI(BX)
IPACK LEVEL INITDELTA(BF,UM)
BX WITH MARKER
BF WITHOUT MARKER
UM WITHOUT MARKER
DELTALOAD
BX Wont Support Delta.
BF WITH MARKER
UM WITH MARKER
Thursday, July 2, 2009
Update Types in BI
Update types in BW/BI
With the update type, you control whether a key figure/data field is updated in the InfoProvider.
Functions
For InfoCubes:
Depending on the aggregation type you entered in the Key Figure Maintenance for this key figure, you are given the options Addition or Maximum or Minimum. If you choose one of these options, new values are updated in the InfoCube.
The aggregation type (addition, minimum & maximum) determines how key figures are updated where primary keys are the same. Thus the total, the minimum or the maximum for these values is formed for new values.
If you entered one of these aggregation types in the key figure definition, it is transferred for the update. Otherwise, the aggregation type addition is automatically selected.
• If you choose no update, the key figures are not updated in the InfoCube, meaning that no data records are written in the InfoCube with the first data transfer, or that data records that already exist, will remain in place with subsequent transfers.
For InfoObjects:
Only the Overwrite option is available. With this option, new values are updated to the InfoObject.
For ODS Objects:
1. Depending on the type of data and DataSource, you have the options Addition, Minimum, Maximum or Overwrite. If you choose one of these options, new values are updated in the ODS object.
For numerical data fields, you are given a proposal for the update type through the characteristic 0RECORDMODE. If only the after-image is delivered, the system proposes Overwrite. However, it could make sense to change this: For example, with the meter data field “# Changes”, which is filled with a constant 1 but still has to be updated through addition, although only an after-image is delivered.
Characteristic 0RECORDMODE is used to pass indicators of the DataSource (from SAP systems) to the update.
You do not need characteristic 0RECORDMODE as long as you do not load delta requests in the ODS object or only from file DataSources.
a. Addition:
Addition is not supported with the data types CHAR, DAT, TIMS, CUKY and UNIT. To be able to use the addition function, make sure the DataSource is compatible with an additive delta.
b. Overwrite:
Whether overwriting is supported is determined by the delta-compatibility of the DataSource.
In this example, the order quantity changes after it has been loaded into BW. With the second load process the data is overwritten since it has the same primary key.
First load process
Document No. Document Item Order Quantity Unit of measure
100001 10 200 Pieces
100001 20 150 Pieces
100002 10 250 Kg
Second load process
Document No. Document Item Order Quantity Unit of measure
100001 10 180 Pieces
100001 20 165 Pieces
When you update data, the system keeps to the time sequence of the data packages and requests. You have to decide the logical order of the update yourself. Meaning, for example, orders must be requested before deliveries; otherwise the wrong results may appear when you overwrite the data.
c. If you choose no update, the data fields are not updated in the ODS object, meaning that no data records are written in the ODS object with the first data transfer, or that data records that already exist will remain in place with subsequent transfers.
With the update type, you control whether a key figure/data field is updated in the InfoProvider.
Functions
For InfoCubes:
Depending on the aggregation type you entered in the Key Figure Maintenance for this key figure, you are given the options Addition or Maximum or Minimum. If you choose one of these options, new values are updated in the InfoCube.
The aggregation type (addition, minimum & maximum) determines how key figures are updated where primary keys are the same. Thus the total, the minimum or the maximum for these values is formed for new values.
If you entered one of these aggregation types in the key figure definition, it is transferred for the update. Otherwise, the aggregation type addition is automatically selected.
• If you choose no update, the key figures are not updated in the InfoCube, meaning that no data records are written in the InfoCube with the first data transfer, or that data records that already exist, will remain in place with subsequent transfers.
For InfoObjects:
Only the Overwrite option is available. With this option, new values are updated to the InfoObject.
For ODS Objects:
1. Depending on the type of data and DataSource, you have the options Addition, Minimum, Maximum or Overwrite. If you choose one of these options, new values are updated in the ODS object.
For numerical data fields, you are given a proposal for the update type through the characteristic 0RECORDMODE. If only the after-image is delivered, the system proposes Overwrite. However, it could make sense to change this: For example, with the meter data field “# Changes”, which is filled with a constant 1 but still has to be updated through addition, although only an after-image is delivered.
Characteristic 0RECORDMODE is used to pass indicators of the DataSource (from SAP systems) to the update.
You do not need characteristic 0RECORDMODE as long as you do not load delta requests in the ODS object or only from file DataSources.
a. Addition:
Addition is not supported with the data types CHAR, DAT, TIMS, CUKY and UNIT. To be able to use the addition function, make sure the DataSource is compatible with an additive delta.
b. Overwrite:
Whether overwriting is supported is determined by the delta-compatibility of the DataSource.
In this example, the order quantity changes after it has been loaded into BW. With the second load process the data is overwritten since it has the same primary key.
First load process
Document No. Document Item Order Quantity Unit of measure
100001 10 200 Pieces
100001 20 150 Pieces
100002 10 250 Kg
Second load process
Document No. Document Item Order Quantity Unit of measure
100001 10 180 Pieces
100001 20 165 Pieces
When you update data, the system keeps to the time sequence of the data packages and requests. You have to decide the logical order of the update yourself. Meaning, for example, orders must be requested before deliveries; otherwise the wrong results may appear when you overwrite the data.
c. If you choose no update, the data fields are not updated in the ODS object, meaning that no data records are written in the ODS object with the first data transfer, or that data records that already exist will remain in place with subsequent transfers.
Subscribe to:
Posts (Atom)